O PSL-PI tem por objetivo incentivar o uso e a produção de software livre no Piauí como política de combate à exclusão digital. Acreditamos que a distribuição de conhecimentos proporcionada pelo Open Source/Software Livre tornará nossa sociedade mais justa e próspera, exatamente por dar a todos as mesmas condições de conhecimento e desenvolvimento.
Software Livre é uma grande oportunidade de construirmos uma sociedade produtora de ciência, independente e efetivamente competitiva. Estamos reconstruindo as bases da nossa sociedade, não mais calcados nos braços do Estado, mas sim, amparados pela iniciativa própria, pela auto-determinação. Nós somos capazes de nos auto-governar. Somos capazes de construir uma sociedade efetivamente Livre. Esta é a essência do PSL-PI.
O PSL-PI é formado pela articulação de indivíduos que atuam em instituições publicas e privadas, grupos de usuários e desenvolvedores de software livre, empresas, governos ou ONGs, e demais setores da sociedade. O importante é a consciência e disposição para propagar o uso de software livre e a cultura colaborativa nas diferentes esferas da sociedade.
Francisco Fernandes: Modelos tridimensionais no Inkscape 1: importando e editando
17 de Maio de 2012, 0:00 - sem comentários aindaCom o Inkscape aberto, vá em Extensões > Renderizar > 3D Polyhedron. Essa ação irá abrir uma caixa de diálogo em que você poderar escolher que objetos você quer renderizar. Escolha Load from file, informe o caminho completo do modelo (infelizmente não tem um diálogo que cuide disso, então é no braço mesmo que o modelo deve ser informado) e clique em Aplicar.
Com isso você já renderizou seu modelo tridimensional. Você pode alterar algumas características do objeto que vai ser como por exemplo a posição em que o modelo será visualizado, na aba View. Nela você poderá definir 6 rotações a serem aplicadas no objeto em torno dos eixos X, Y e Z com os valores dos ângulos em graus. Pode-se marcar a caixa Pré-Visualizar, para ver como será exibido o objeto antes de renderizá-lo.
E finalmente, pode-se definir o estilo do objeto a ser renderizado. Tem-se Scaling factor, para definir em que tamanho o objeto será gerado; Fill color, com opções Red, Green e Blue para alterar os valores RGB das faces do modelo tridimensional; Stroke opacity e Stroke width para definir a opacidade e largura das arestas, respectivamente. Pode-se definir a posição da luz em Light X, Y e Z, no caso do sombreamento do objeto ter sido habilitado na caixa Shading.
Depois disso, se quiser inserir mais informações sobre o objeto, basta seguir o tutorial de inserção de Latex no Inkscape.
AJ Alves: Continuous2Wheels – Para robôs de duas rodas com Arduino
11 de Maio de 2012, 0:00 - sem comentários aindaContinuous2Wheels - Biblioteca para Arduino
Continuous2Wheels é uma biblioteca de Arduino para controlar os movimentos de robôs guiados por duas rodas ligado a servo-motores contínuos.
Página oficial: Continuous2Wheels no GitHub
Instalação
Faça um git clone ou download deste projeto para a pasta de bibliotecas do Arduino:
no Ubuntu (/usr/share/arduino/bibliotecas/) caso instalado via apt-get
no Windows, Mac ou Linux(Onde você baixou o IDE Arduino, a pasta de biblioteca está dentro)
Agora está tudo pronto, basta:
Abra o seu Arduino IDE, vá a SKETCKS → BIBLIOTECA → Importar Continuous2Wheels
Uso
#include <Servo.h>
#include <Continuous2Wheels.h> //Importando nossa biblioteca
Servo rightWheel, leftWheel;
int rightWheelPin = 9; // Pino da roda direita
int leftWheelPin = 10; //Pino da roda esquerda
double wheelRadius = 3.6; //Raio das rodas, em centímetors
double bendRadius = 12.2; //Raio de curva, é a distância de uma roda a outra, é o tamanho do eixo, em centímetros
// Criando uma instância da nossa bibliotecam, com um de seus construtores
// Não esqueça de passa os PONTEIROS dos objetos Servo, para isso, antes da variável coloque &
Continuous2Wheels c2w(&rightWheel, &leftWheel, wheelRadius, bendRadius);
void setup(){
// Configure os seus servos normalmente rightWheel.attach(rightWheelPin); leftWheel.attach(leftWheelPin);
}
void loop(){
c2w.forward(45); // Move o robô para frente em uma velocidade de 45 delay(4000); c2w.bend(90); // Faz uma curva a direita em 90° delay(4000); c2w.backward(45); // Move o robô para traz em uma velocidade de 45 delay(4000); c2w.bend(-90); // Faz uma curva a esquerda em 90° delay(4000); c2w.stop(); // Para as rodas delay(10000);
}
Este exemplo, usa as funcionalidades mais simples da biblioteca, logo logo farei um post com as funcionalidades avançadas, se quiser conhecer-las antes, vá a Continuous2Wheels no GitHub

O trabalho Continuous2Wheels de AJ Alves foi licenciado com uma Licença Creative Commons – Atribuição – CompartilhaIgual 3.0 Não Adaptada.
Com base no trabalho disponível em github.com.
Podem estar disponíveis autorizações adicionais ao âmbito desta licença em github.com/zerokol/.
Francisco Fernandes: The right tools for the right job
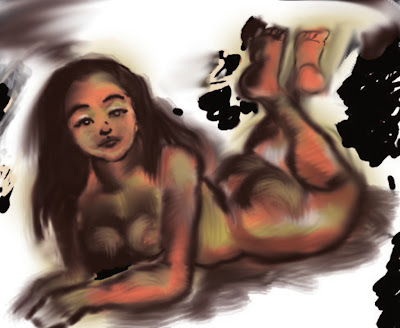
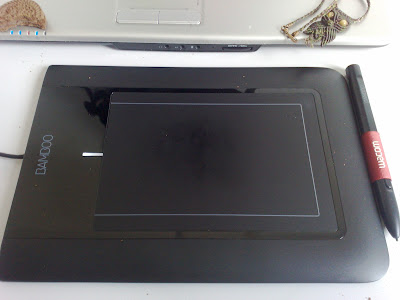
9 de Maio de 2012, 0:00 - sem comentários aindaLast year I bought a Wacom Bamboo tablet to enjoy my free time studying some digital art with Krita and MyPaint. I lent it to my girlfriend for a few months after 2011 Christmas so she could have some fun too. Angela was here in Natal last week (while the Lakademy was happening in Porto Alegre, south of Brazil ) and she brought it back. I askd her to bring it to me so I could use it while I am working in my GSoC project.
 |
| just a test i made when Krita 2.4 was still in Alpha 3 |
It takes some time to get used to this kind of input device but after that it’s really fun to do things with it. I really love drawing, but the reason why I bought a tablet was that my painting skills it’s quite low. I get jealous very easily from other artists works.
Anyway, another point: Angela bought my Qt4 book too, since I had left it in Teresina after I moved to Natal.
I am not a KDE (not even a Qt ) experienced programmer, so the book will help a lot in some things I am doing. For instance, I corrected some points in my granular particles simulation and now I have some right values in it’s output. Although some errors persists, I got some key values right. It’s just some numbers in a text file, but as soon I eliminate some Batman lyrics (NaNs are one of my nightmares), the next step it’s to pass the generated values to a sequence of QImages and see if the particles got the right pixels and the right movements.
 |
| a speed painting Angela made with my wacom |
As I said in previous posts, this project it’s not a easy one. It requires a real-time approach to a not so common particle type. The simulation I did have some serious performance drawbacks. For just a few particles (200 particles in the data set randomly initialized and distributed in a euclidean plane of size 100×100 units) the simulation takes almost 3 minutes to run 1000 steps, with a few wrong outputs !! It’s a really bad result.
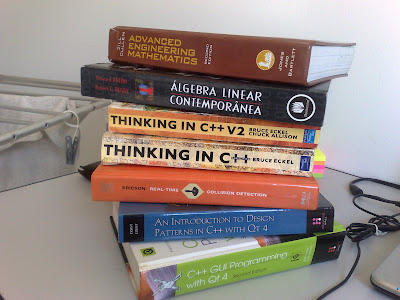
After that, I gathered a handfull of books related to the topic. Physics and engineering are the fundamentals, but a real-time approach it’s the more important feature in the project. I got a book with my university advicer about real-time collision detection in the hope that it will help me do a better job in this simulation.
 |
| Real-time collitions, linear algebra, engineering math and Qt/C++ : the tools for the job |
Another point is that I’m thinking of trying to see the actual state of it using a OpenCL approach. I have access to a relative good computer in the university: a i3 intel processor with 4Gb of RAM with a NVidia graphics board. With that, what need to be done it’s some self-training in this tecnology. I never coded in OpenCL before and the talk around here is that it’s really hard. I check it out with a few OpenCL tutorials and I have to agree with the guys: it’s really tough. A simple hello world pass through all kinds of concepts, from context creation, through devices association to kernel programming. Fortunately, I found a few books about it too.
Anyway, if you want to check it out the actual state of my simulation, the repository is hosted in my gitorious account. I did not allowed merge requests since the code it’s quite unstable, but it’s well commented and have some references if you want to understand it better. I’m already writting another post with the theory behind the simulation, doing a more extensive and well detailed explanation of the concepts (some few drawings and formulas for our enlightment ![]()
Until next round!
Aracele Torres: The Hydra Bay: corte 1 fora e 2 novos aparecem!
7 de Maio de 2012, 0:00 - sem comentários aindaDepois que um tribunal do Reino Unido decidiu bloquear o The Pirate Bay sob a (velha) acusação de que ele estaria violando direitos autorais, os responsáveis pelo baía pirata mais acessada da internet decidiram reagir a esse bloqueio oferecendo aos usuários a possibilidade de acessarem o TPB usando um proxy. Os piratas criaram uma operação especial com o nome de The Hydra Bay, uma referência à um animal da mitologia grega que tinha corpo de dragão e cabeças de serpente, que quando cortadas nasciam outras no lugar.
A Hydra Bay pretende ser uma estratégia de multiplicação de proxies e, consequentemente, de boicote à censura feita por diversos governos ao site do The Pirate Bay. Na página piratereverse.info, os piratas ensinam como se proteger da censura com o simples uso de um proxy, uma alternativa barata e eficaz. Os tutoriais são uma forma de “atacar o sistema com proxies”, como eles explicam na página da operação:
Esses guias foram criados no espírito d’A Hydra Bay. Na mitologia grega antiga, a hidra era uma serpente que possuía muitas cabeças. Hércules foi enviado para matá-la como um de seus doze trabalhos, mas para cada uma das cabeças que ele decapitava, mais duas cresciam. De certa forma, é o que nós estamos tentando fazer; ISPs bloqueiam o The Pirate Bay e muito mais proxies aparecem.
Não poderia haver uma metáfora melhor para se referir ao movimento que defende o compartilhamento das informações. O TPB, que sempre foi uma grande referência dentro desse movimento, vem sofrendo ataques e censura desde o inicio de suas atividades. Mas a sua reação sempre foi similar à de uma cabeça de Hidra, se regenerar. Todos esses ataques não passaram de cortes nas cabeças do TPB, cortes que sempre resultam em novos recomeços e em cabeças regeneradas, prontas para uma nova batalha.
Na página do Facebook do TPB é possível também ver a mensagem:
WE ARE THE HYDRA BAY!
CUT 1 OFF, 2 NEW APPEARS!
ATTACK THE SYSTEM WITH PROXIES!
A grande mensagem que o TPB tem nos passado de 2006 até agora é a de que eles sempre voltarão e de que é inútil cortar suas cabeças fora. ![]()
Francisco Fernandes: A little understanding on Krita’s structure
5 de Maio de 2012, 0:00 - sem comentários aindaThis last thursday Boudwewijn schedule a skype chat group to present the main concepts of the Krita development. It was really nice, since a more dynamic interaction was made with the students. It answered some doubts I had and important features was explained. It covered from the KDE and Calligra foundation of Krita to dockers and resource management of the software.
I am posting here a few notes about what I got from it and some notes on how I imagine some of these will affect directly in my project. If any concept that I wrote here is wrong, please, leave a comment correcting me. This would be really helpful and more than welcome!
Color Management
I am familiar with color models concept, but not so familiar with color spaces. This was a good point in the presentation. It clarified to me that I do not have to worry about how to deal with these spaces since the color management libraries take care of it. Although I have some interest to understand how to manage colors, I think I will have to leave that for another time.
Tiles
Krita tiles was a really new concept to me. After you talk about the advantages of divide the pixels in groups, it makes sense and we question ourselves why we didn’t though about that before. Dmitry posted in the mail group a nice article about the Krita tiles. I believe I have to take some time to discuss this point with him. In my project I’ll deal with a considerable amount of particles so a full understaning on this framework will garantee a better performance of the brush. In one of the books I’m reading, a improvement in the grain interactions performance is done with the division of the space in tiles, although is suggested to divide the 2D region or in uniform Voronoi tiles or in a hexagonal grid. I think that in a general way, the effects are the same for the application, so the tile form doesn’t play a mean role.
Data Structure and Image composition
This was one of the trickiest definitions of the presentation. In a program like Krita, which have a big amount of processing and operations done at pixels, it’s expected that we should have a not so straightforward data structure.
The base class of the image components is the KisBaseNode class. It takes care of other nodes, layers and selections of the image. However this class do not have anything to do with its peers. For that, we use a KisNode, which is the parent class for Layers and Masks. Along with that, every node has a representation of it, which we call the Projection of that node. It’s a rendered result of the layer, with the processed data applied. For the composition of the final image result, a multithread structure is behind each node. Then to produce the result in the parent node, the setDirty method will pass through all the way up to it.
I don’t know if in the future I will need to modify or create a new layer type since the feeling of live sandpainting would need a lot of updates in the canvas. I asked that in the chat group and probably I will not need to do it. For instance, the closest feature in Krita that deals with this kind of painting is the Deform Brush. It modifies the closest pixels several times and updates the canvas after each mouse movement, so it’s more or less what I wanted.
Canvas and Tool Handling
The canvas take care of the user interaction through mouse, keyboard and tablet, paints the decorations and the visible image results. It has two implementations: one based on OpenGL and another based on QPainter. I had to look directly on the code to understand this better, but i think the main reason to have two implementations is that if the user have OpenGL on his/her computer, a better perfomance widget can be used. Otherwise, the QPainter based canvas will be used. Both classes inherit from KisAbstractCanvasWidget, so both has to have the same event handling.
When we modify something with a tool, the canvas have a Tool Proxy, which manages the current tool. So, when we change from some tool to another, the native events are mapped to the newly chosen tool. Then, when the tool does a operation, it requires a canvas update so the user can get the result.
Painting
I didn’t have much trouble to understand this point. Pentalis helped me a lot in this part. I even made a simple paintop modifying one of the paintops plugins in the source code. The Chalk Brush have a simple implementation and it was easy to understand the code and modify it. Most of my doubts in doing it was in the underlying structure, like how paint devices and layers worked together, but the presentation answered most of it.
Filters, Resources, Imports and Exports
These features wasn’t so hard to understand. Filters have the usual concept and is applyed in a multi-threaded stateless way. It is implemented as plugins in Krita. Imports and Exports use the KoFilter class as base of the implementation and invokes KoFilterChain to do the sequence of operations to complete the conversions. Resources are managed using KoResourceServer and manages resources of one type at a time. To represent the resource itself we use a KoResource as base class.
That’s it
This was what I got from the presentation. I have some notes about other questions that came after, but I believe that I have to write it with more visual details to a full undestanding about what I’m working on. My particle simulation didn’t work as I was expecting and I have to spend some time debugging it. Pentalis suggested that, after the simulation is working, I write the positions updates in QImages so we could have the visual feel of the particles moving. After that, I have to formulate how I will do this visual feeling in Krita, but I believe that with this brief background I will be able to do it.
See you later!


